Mannequin Poses and Postures: How to Choose Stances for Retail Display
The four pose families used in retail, which garments each suits, how poses should work together in a group, and where adjustable wooden arms let one body carry many stances.
Two mannequins wearing the same outfit can sell it very differently. One stands square, arms at its sides, and the garment hangs like it is on a rail. The other shifts its weight, turns a shoulder and tucks a hand into a pocket, and suddenly the same coat has drape, movement and a reason to be looked at. The difference is posture, and it is decided long before the garment goes on.
This guide explains the main mannequin poses used in retail, which garments each one suits, how a set of poses should work together on a floor or in a window, and where adjustable arms change the calculation. It is written for buyers and visual merchandisers specifying forms for a brand, not for a single one-off display.
The four basic pose families
| Pose family | What it looks like | Best for |
|---|---|---|
| Straight standing | Weight evenly on both legs, torso square, head forward | Tailoring, uniforms, outerwear, anything where the cut must read cleanly |
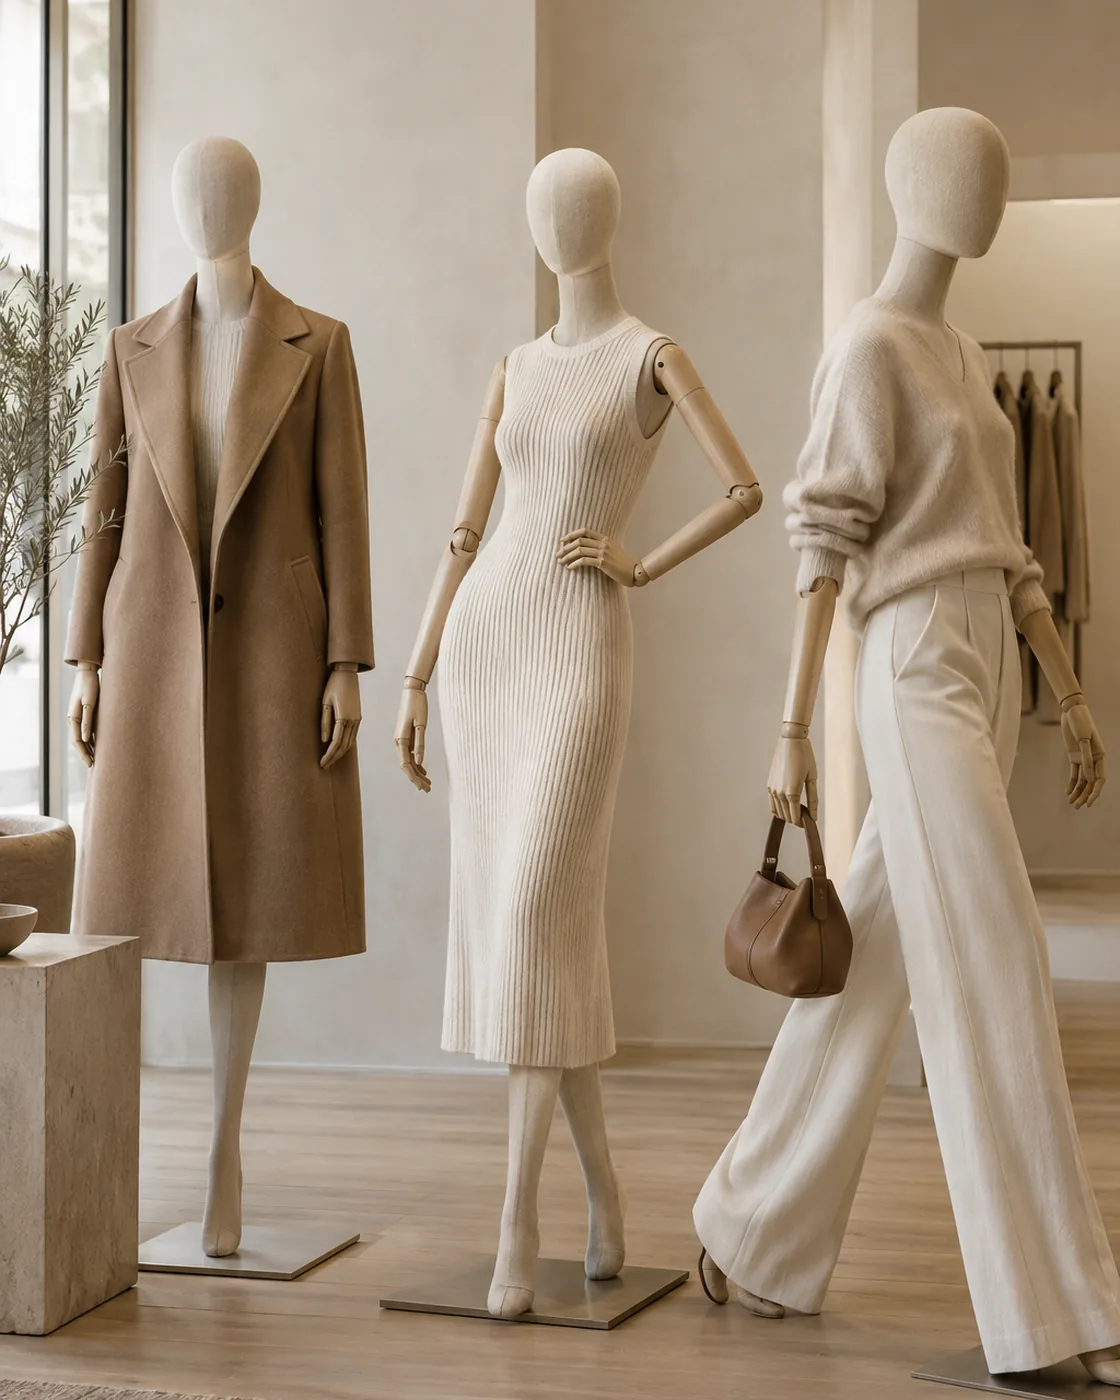
| Contrapposto (weight on one leg) | Hip shifted, opposite shoulder dropped, gentle S-curve | Dresses, knitwear, casual and premium womenswear; the default “natural” pose |
| Walking or stepping | One leg forward, torso slightly rotated | Trousers, skirts with movement, sportswear, window displays that need energy |
| Seated and leaning | Sitting on a plinth or leaning against a fixture | Lounge and denim, lifestyle vignettes, low windows and shallow spaces |
Most retail fleets are built on the first two. Walking and seated forms are used more sparingly because they take more floor space, are harder to dress, and cannot be repurposed as easily when the season changes.
Matching pose to garment
The rule is that the pose should show the garment’s construction, not fight it.
- Tailored jackets and coats want a straight or barely shifted stance with the shoulders level, so the shoulder line, lapel roll and hem sit as the tailor intended. A strong hip shift twists the jacket and creates pulls at the buttons.
- Dresses and skirts benefit from a weight shift because the drop of the hip lets fabric fall in folds rather than as a tube. This is where contrapposto earns its place.
- Trousers read best with one leg slightly forward: the break at the ankle and the line of the leg become visible, which a square stance hides.
- Knitwear and layering need arms doing something — a hand at the hip, a sleeve pushed up, a scarf held — because the interest is in texture and drape rather than silhouette.
- Outerwear often looks best open, with one arm slightly away from the body so the lining and the garment underneath are visible.
Our guides to female mannequins and male mannequins for retail cover how form type interacts with the garment categories you carry.
Fixed poses versus adjustable arms
A sculpted pose is fixed at the mould. Every form from that mould stands the same way, forever. That consistency is a strength on a floor where the brand wants one recognisable stance, and a weakness the moment the merchandising changes and the pose no longer suits the product.
Adjustable wooden arms, jointed at the shoulder, elbow and wrist, separate the body pose from the arm pose. The body keeps a stable, usually neutral stance, and the arms are set on the floor for each scheme — hands in pockets for outerwear, one arm raised to hold a bag, both relaxed for tailoring. In practice this gives a fleet of identical forms the range of several fixed poses, which is why articulated arms are standard for brands whose displays rotate often. Our wooden arms guide explains the joints and what to specify; our adjustable mannequins guide covers the wider category.
Two cautions. First, arms only change what the arms do; a body sculpted square will still stand square. If you need a hip shift, order it in the body. Second, articulated arms need staff who know how to pose them. A form with arms left at odd angles looks worse than a fixed pose, so a short posing guide for store teams is worth writing.
Head position and what it does
A small turn of the head changes how a display is read. A head facing straight ahead addresses the viewer directly and suits formal, symmetrical schemes. A head turned a few degrees toward the traffic direction, or toward another form in the group, creates a line of sight that pulls the eye through the display. Faceless egg heads are particularly effective here because the turn is read purely as gesture, without expression. Where heads are removable, decide at specification whether the neck fitting allows rotation or fixes the head in one direction; not all do.
Composing poses in a group
Poses are chosen for the set, not one form at a time. A few principles that hold across formats:
- One hero, supporting cast. The form wearing the key piece takes the most dynamic pose or the most forward position. The others are calmer.
- Vary, but within a family. Three forms with three unrelated poses look like a stockroom. Three variations on a contrapposto — different hip sides, different head turns — look like a group.
- Point them at each other or at the customer. Forms that face nothing look abandoned. Angle them so the group has an internal relationship or an outward one.
- Leave room for the garment. A walking pose needs depth; a raised arm needs width. Check the fixture footprint before choosing the pose.
Our article on mannequin grouping and composition goes further into arrangement, and the window display mannequins guide covers how posture reads from the street.
Poses for windows versus the shop floor
On the floor, customers walk around the form, so a pose only has to work from several angles and can be fairly neutral. In a window it is seen from one direction, at a distance, for a few seconds, and needs more asymmetry to register: a stronger weight shift, a clearer arm gesture, a head turned toward the pavement. Many brands keep two pose standards for this reason — a calmer set for the floor and a more animated set for windows — using articulated arms to get both from one body.
Practical considerations when specifying poses
- Dressing time. Straight and contrapposto forms dress fastest. Walking and seated forms take longer and often need arms removed to get sleeves on. Multiply by the number of changes a year.
- Stability. A pronounced lean or step moves the centre of gravity and needs a heavier or wider base. Confirm the base is matched to the pose rather than generic.
- Interchangeability. If arms, hands and heads are shared across a fleet, poses must use the same fittings. Ask the manufacturer to confirm before mixing poses in one order.
- Future flexibility. The more specific the sculpted pose, the shorter its useful life. A neutral body with articulated arms is the most reusable option and the easiest to re-cover or refresh later.
Poses are one line of a good specification; the full list is in our guide to briefing a mannequin manufacturer.
Choosing a pose standard for your brand
For most fashion brands, the practical answer is a small number of body poses — usually a straight stance for tailoring and a gentle weight shift for everything else — combined with adjustable wooden arms that carry the seasonal variation. That gives a consistent silhouette across stores, keeps dressing time down and lets each store animate its displays without new forms.
If you are deciding on poses for a new store or a fleet refresh, send us a few photographs of the garments and the space through WhatsApp or the quote form. We can recommend body poses and arm configurations from our range, or discuss a custom stance if the brand needs one.